Showing posts with label Tutorial. Show all posts

Friday, July 19, 2013

Clothing Swap Tutorial by Victoria


Hello to all of Bethany's lovely readers! I'm so excited to be doing my first guest post ever here at Happily Rambling. 

About four times a year, my girlfriends and I swap all of our unused/ill-fitting/unloved-but-still-gorgeous clothing, accessories and shoes with each other. Aside from Christmas and my birthday, when we swap, I feel like the luckiest girl ever. I end the day with a de-cluttered closet and lots of treasures. For free, people!

Here's a tutorial on how we swap: 

1. Send out an invite at least a month before. Enough prep time is essential so your swappers can sort through their unwanted items and bag them up. If possible it's great for them to deliver their 10+ items to the swap hostess before the event so she can hang, fold and organize them, but it's not necessary. Clothing racks and emptied coat closets work really, but kitchen tables, counters and mantles work fine as well.

2. If you're hosting, create a space free of your home clutter. Not only is this important so the hostesses belongings don't get swapped (!) but also so swappers feel comfortable moving around and seeing everything that's up for grabs. 

3. Start with about an hour of mixing, mingling and trying on clothes, so swappers can decide what their top picks are. Once everyone is settled in with a cocktail, have everyone pick a number out of a hat. If there are 12 swappers, numbers run from 1-12. 

4. Begin! When everyone's ready to start, swapper #1 takes their pick and the group continues through to #12. The last swapper will then go again, and the group will work themselves back down to swapper #1. After everyone has had two picks, the haul becomes a free for all, so MOVE QUICKLY. 

5. The calm after the storm. My favorite part of the swap is after everyone has made their top picks and just chats and drinks and tries on everything that's left. There are often some great little hidden gems to be found and it's great to get so many opinions on outfits. 

6. Get your goodwill on. Anything unwanted gets bagged by the hostess and brought to charity. Win win!

 If you're interested in getting in a little practice before hosting your own swap with some girlfriends, click here for swap meet up groups. I find them to be a little more stressful because, well, we generally tend to be a little less snatchy gentler with people we know. But I've found some really great stuff at these things when I'm able to successfully avoid a panic attack.
Please let me know if you host a swap and come visit me over at Lost in Boston!
 photo signaturecopy_zpsc80579c1.jpg
---------------------------------------
---------------------------------------
Don't forget to come back on Sunday 7/21 for a giveaway with prizes from myself, Victoria, and many of my other amazing sponsors :)

Tuesday, April 2, 2013

Make Your Own Organic Lotion Bar Tutorial

The beginning of spring in Cleveland is always so odd. It snows most days yet always melts, but it's still freezing.  This weather messes me up, it really does.  I own a bath and skin care business and a few of my products (Lotion &  Massage Bars) don't do well in hot weather. April is when I start to worry about shipping my lotions, especially if they are going to the south. They'll get all melt-y and soft when sitting in a hotbox aka mailbox, yet I get tons of interest in buying them in summertime.
Since I'm too nervous about shipping them to the south, I'm going to share my recipe with you all instead.

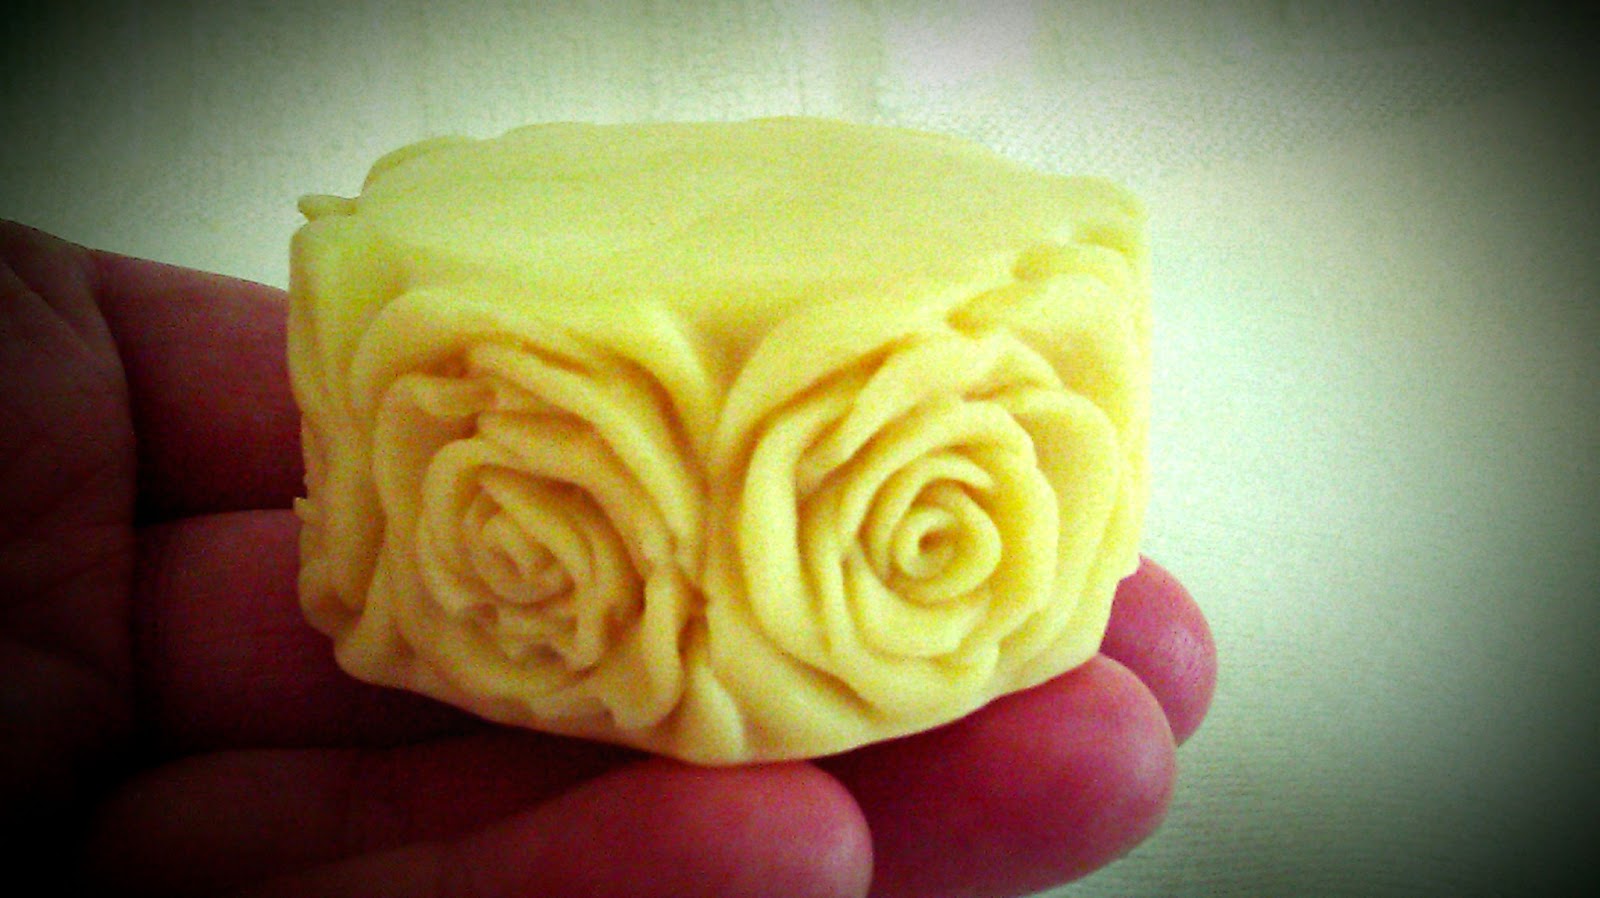
Recipe is for a 2.2 ounce Natural Golden Honey Cocoa Lotion Bar 
I always end up with a little extra, I'll tell you what to do with that extra bit at the end of the post.

Ingredients:

 Measure out 2 TB or 1oz of beeswax and place it in your pyrex or double boiler.  Beeswax takes longer to melt than the butter.  Therefore, melt the Beeswax for about 30-40 seconds before putting in the 2 TB or 1oz of Cocoa Butter.  I love Cocoa Butter so I usually add a few extra pieces of cocoa depending on how prevalent the cocoa scent is, it's all to your taste so add extra if you'd like it to smell a bit stronger.

If you are using a microwave for this melt the Beeswax and Cocoa Butter in 30 second spurts, this decreases the risk of "burning" or over-cooking the mixture.  Once your mix looks like the photo above then it's time to add your carrier oil. I'm using Grapeseed for this bar.

Start off with 1 TB of the Carrier Oil. When you pour the carrier oil in, you will see it start to harden. Do not put it back in the microwave or over the hot boiler, just stir it. After you stir it, there will be a small amount of hardened lotion on your knife, spoon, or stir stick.  Put that little bit on your fingers and rub it in, if it feels too waxy then add another Half TB of Carrier Oil, stir, try again. You can add up to 2 whole Tablespoons of Carrier Oil to your lotion mixture (if you add too much it will be too soft.)


 Get your silicone mold (you can use any size and shape) and slowly pour the lotion mixture into it.  If you pour too quickly air bubbles will form on the bottom and sides of the mold.

 Cover your lotion so that hair and fuzz can't get to it and let it sit for 1-2 hours, depending on the size of the mold. If you find that after 2 hours your lotion isn't hard enough then you may need to melt it again and add up to 1 teaspoon of beeswax to help it harden.
When you're all done you might have extra lotion left in the pyrex of double boiler, if that's the case then just let it harden and pop it out with your fingers or a knife. It will be your little 'black sheep' lotion bar

You can use this same recipe but with White Cocoa & Shea Butter and Essential Oils.
If you use Cocoa and Shea Butter use 1 part Cocoa, 3 parts Shea, and 1-1.5 TB of Carrier Oil.
 ----------------------------------------------------
 If you'd like to see which lotions I have left for April, go here.
I'm thinking of turning all Tuesdays into Tutorial Tuesdays! What do you think?

Friday, January 11, 2013

Nail Polish Tutorials & Giveaway!

I can't even begin to count how much time I've spent searching Pinterest for nail polish tutorials. Have you seen all of the amazingly simple ways to make your nails look like you spent a lot of money of them? I've tried a few tricks and I have been very happy with the outcome of all them.

Here are some of my favorite nail tutorials from Pinterest::

I love nail polish. I really do. I bought a color called Boom Boom by Sinful Colors yesterday; I can't wait to use it! It's hot pink.

Today's New Year New You Giveaway features
3 Nail Polishes
   - Sally Hansen Xtreme Wear, Perky Pink .4oz
   - Sally Hansen Xtreme Wear, Breezy Blue .4oz
   - Sinful Colors Professional, Folly .5oz
Strengthening Nail Polish Remover with Gelatin
4-Way Buffer
Cuticle Stick


Sunday, November 18, 2012

Salt Dough Tutorial // Giveaway Preview


I've got the holiday itch. I want to start decorating for Christmas but I must wait until Saturday. I think I want to start decorating so early because Olivia is making Christmas exciting again. That's a pretty good reason to be early, ya?
However, instead of full on decorating, I decided to give Olivia and myself a few fun pre-holiday craft projects.
Yesterday's project was Salt Dough Ornaments.

You will need:
2 cups flour
1cup salt
1 cup warm water
A bit of extra flour to roll dough on
*This dough can be saved for a few days in the fridge*
Heat oven to 200 degrees Fahrenheit.

Mix the dry ingredients together. Once mixed, slowly add the water while stirring. Lightly whisk the mixture until a soft, non sticky, dough forms.

Now it's time to knead! Knead the dough for 3-5 minutes then roll it out on a clean, lightly floured surface. Grab your favorite cookie cutters or shot glasses (makes cute little circles) and cut out your desired number of shapes. Put your dough ornaments on a nonstick baking pan, or a pan covered with parchment paper and bake for 100-135 minutes (time depends on thickness of dough) at 200 degrees Fahrenheit. Cooking the ornaments a bit longer will give them a light tan color/rustic look.
**Don't forget to cut a small hole for ribbon or an ornament hook BEFORE baking, straws work really well for this**

Once the ornaments have cooled it's time to paint.
We used watercolors, but acrylics work really well, too.


☆★☆★☆★☆★☆★☆★☆★☆★☆★☆★☆★☆★☆★☆★☆★☆
GIVEAWAY PREVIEW
 The giveaway begins tonight at Midnight EST.
One winner will receive a 2oz Organic Honey Cocoa (Beeswax and Cocoa Butter) Lotion Bar, a 2oz Natural Coffee Scrub, and a Vanilla Lip Butter tube ~ valued at $13.50

Contest is open to US and Canada residents.